How to attach a virtual disk on Linux based Virtual Machine and map it to a path or folder?
Attaching a disk to VM in Virtualbox. Virtual Disk, Linux VM, Virtual Machine


In this post, you will learn how to add a new virtual disk to an existing Virtual Machine. For example, in this post, Mint Operating System running in Virtual Box will be used but the same will be applicable to any other Linux distros (Ubuntu, Redhat, Rocky, or Centos).
Go to the setting page of the Virtual Machine to which you want to add a new disk.
Jump to Storage setting. One can see Plus icon in the controller and start adding the virtual disk.
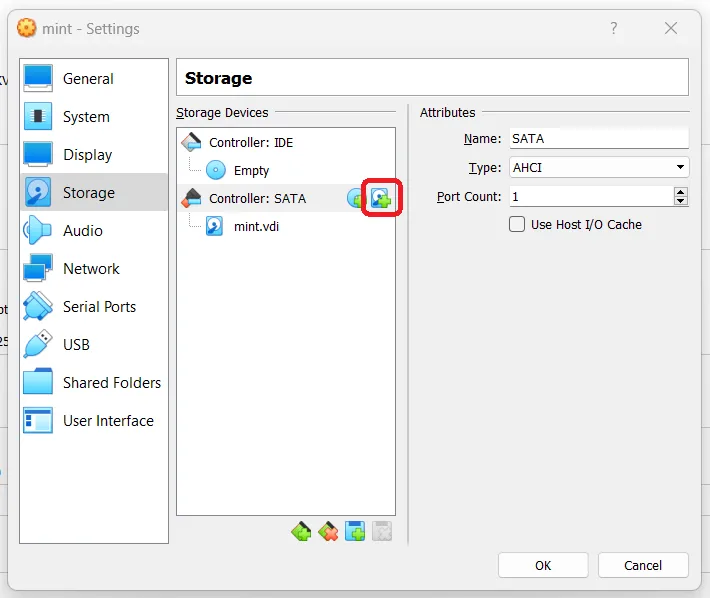
Click create disk icon to create a new disk.
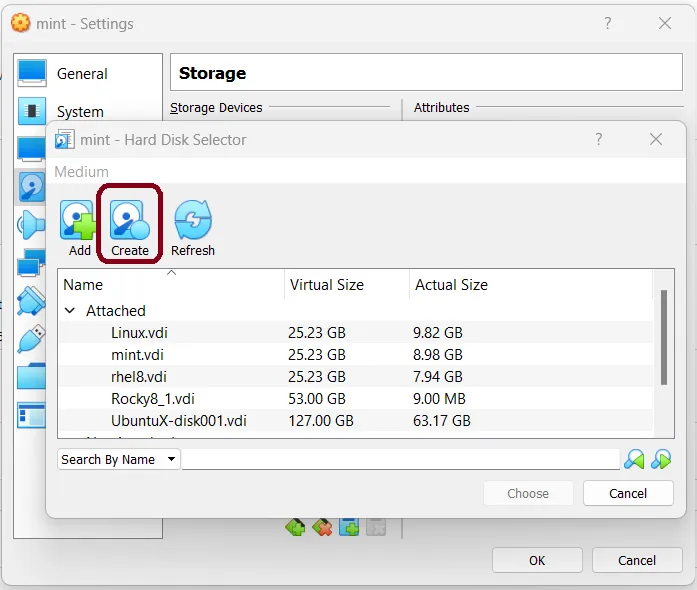
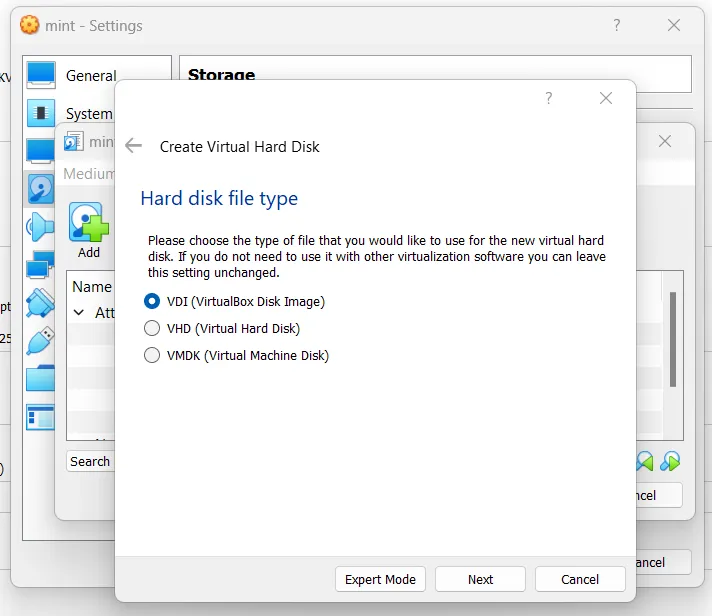
Select the disk type. On VirtualBox VDI is default type
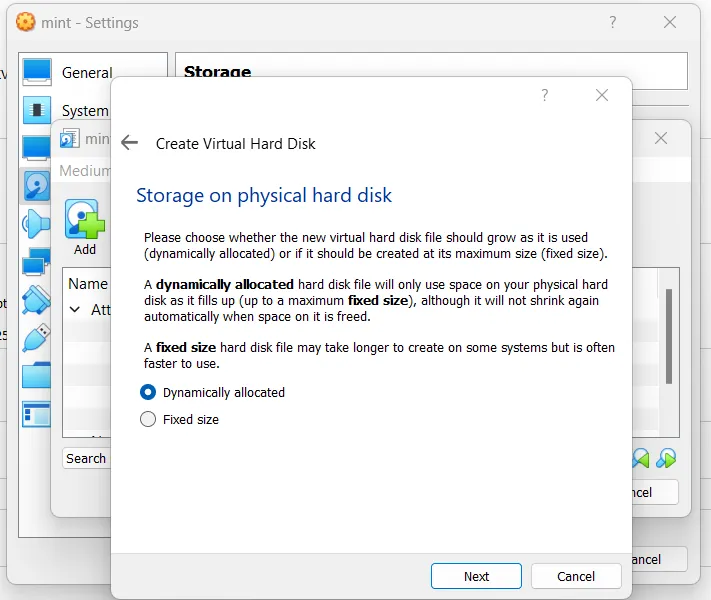
One can select Fixed Size. The performance of Fixed Size will be better than Dynamically allocated disk.
Here, 10 GB of disk is being created. One can create based on their requirement.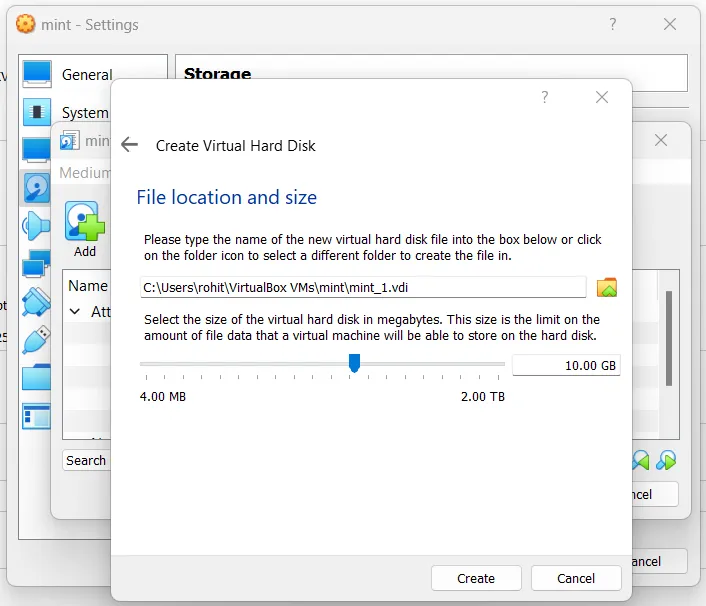
Select the created disk to add.
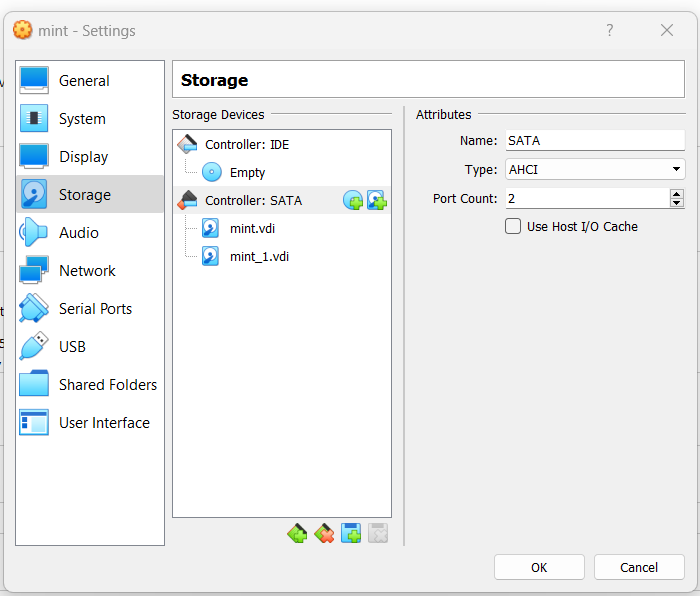
After adding the controller should show one more disk. In the below example, it’s mint_1.vdi
After creating and adding the disk to the virtual machine. Start the Virtual Machine and Open a terminal and run a few commands.
Check if the System identifies the new disk using the fdisk command. For example, Disk /dev/sdb is newly added disk in the below image. It’s not guranteed that you will get /dev/sdb path but it will in the format of /dev/sd
sudo fdisk -l Confirm the existing partition in the system using the df command. For example, there are different paritions but attahed to previous disk i.e /dev/sda
df -h 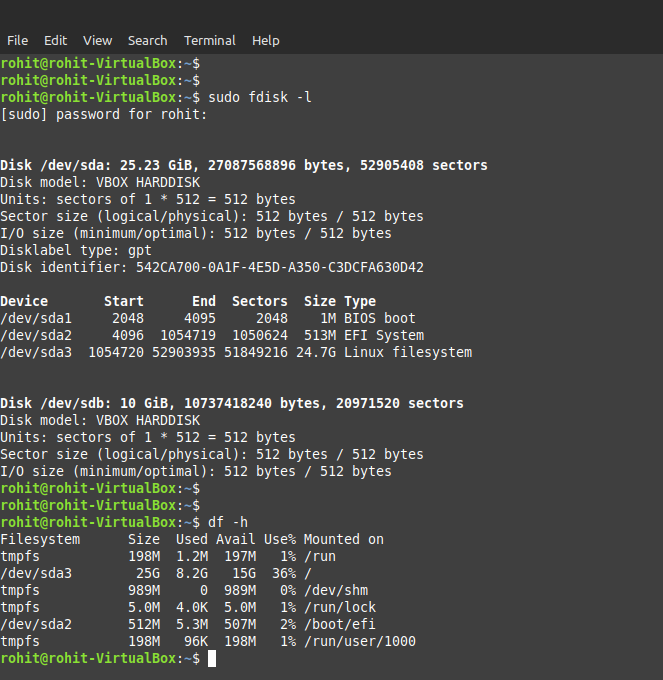
Create a partition on the disk. One can do that using fdisk /dev/
sudo fdisk /dev/sdbpress m to run the help and see the command options and follow the next steps to continue.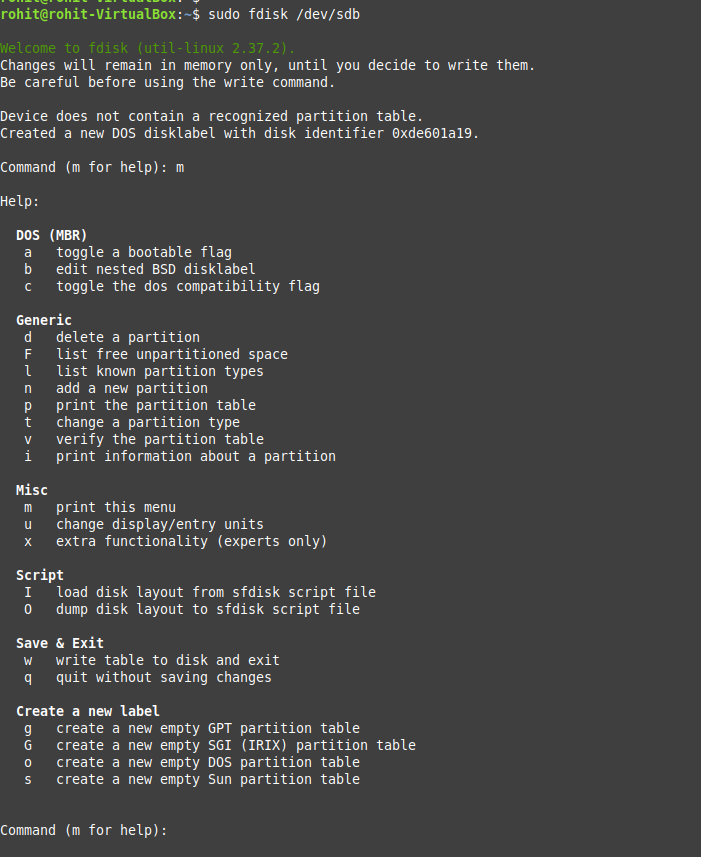
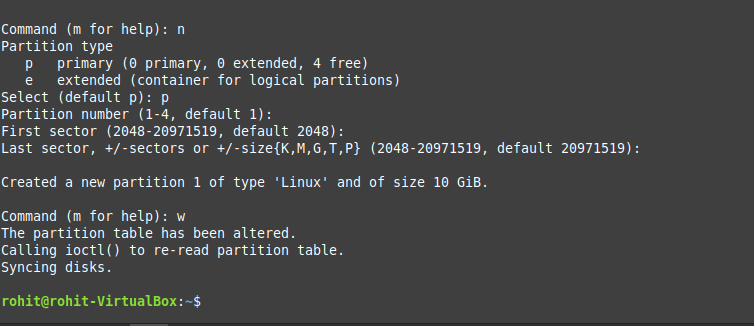
Continue- To create a partition type n. Here, only one partition will be created. We can also create more than one partition but that is for another lesson.
Continue – Type Enter to select the default number of partitions i.e 1
Continue – Type Enter to the default value of First Sector i.e 2048
Continue – Type Enter to select the default value of Last Sector. This value will vary from the attached image if the disk size is not 10GB.
Continue – Type w to write the partition info. This will also exit the fdisk command.
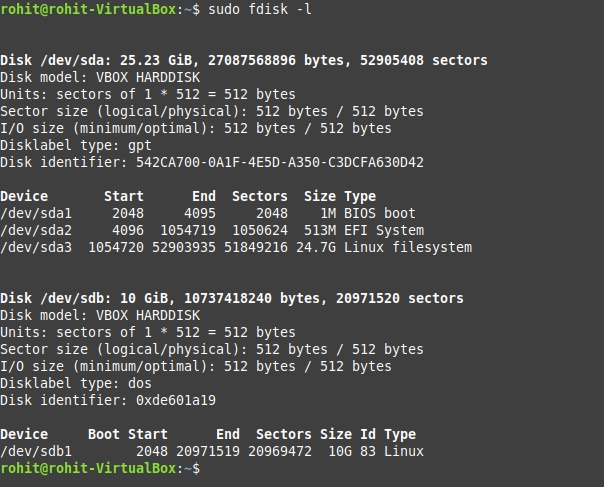
Post that , you can see the newly created parition using fdisk.
sudo fdisk -l In the example, you can notice /dev/sdb1 got created with Id 83.
Now, you have to format the disk partition using mkfs command option. In the example, we will be using xfs type to parition if you want you can also use other Linux Supported Partitions.
sudo mkfs.xfs /dev/sdb1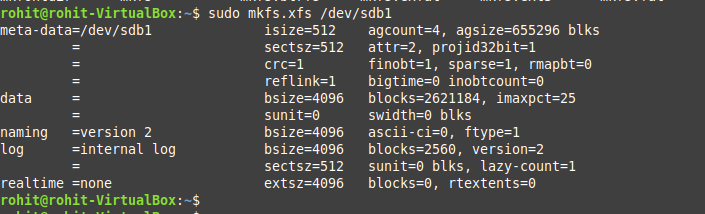
Now, we will mount the partition to a system path. For example, /data folder will be created and the newly created partition will be mounted to the /data folder.
To create a directory run the below command and run the mount command to mount the partition.
sudo mkdir /data
sudo mount /dev/sdb1 /data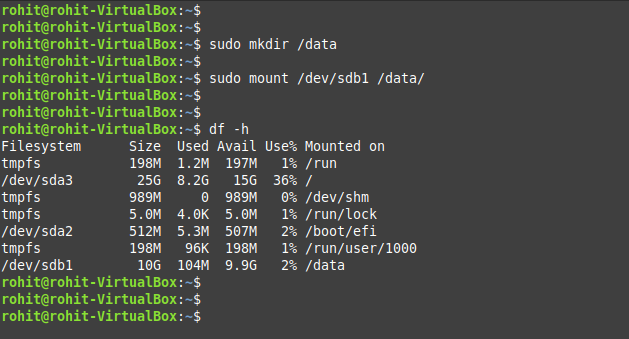
To add this configuration permanently, we can edit the fstab file and add the information there. so that even after the reboot it should be mounted.
In the fstab file we can either add /dev/
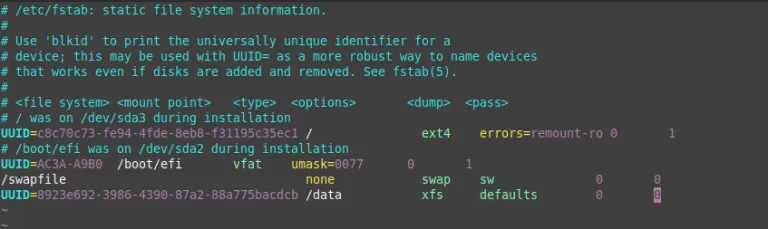
To add the configuration as disk partitions edit the /etc/fstab file with administrator/root user and append the below line.
/dev/sdb1 /data xfs defaults 0 0
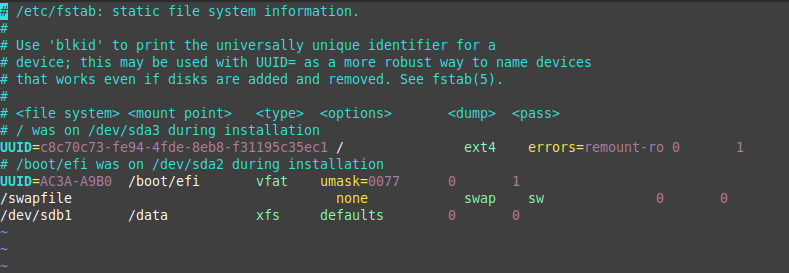
OR if you want to use UUID then run
blkid /dev/sdb1
The output of this will display the UUID of the disk partition. Use the same UUID to in fstab.
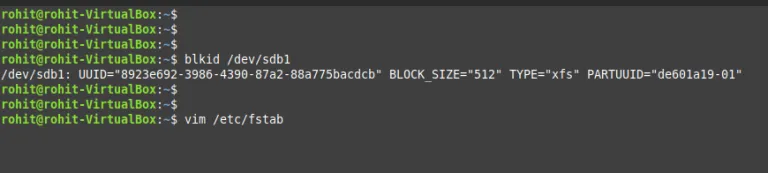
Replace
UUID=
/data xfs defaults 0 0
After saving the fstab configuration reboot your system to validate whether /dev/sdb1 is mounted to the /data folder or not.
again use the df -h command to verify the partitions.
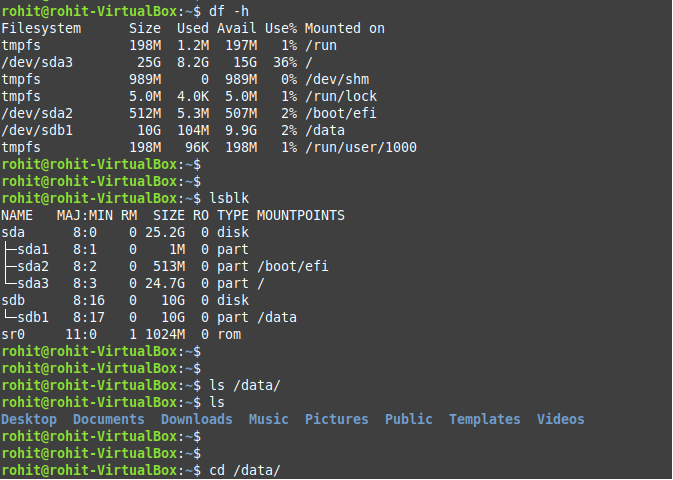
Now, you should be able to use the /data directory do file operations in that directory. Bydefault owner of the /data folder will be root. You can change it your user or group using chown command.
sudo chown -R <user>:<group/user> /data